Category Archives: Documentation

Show Posts Shortcode

There is a show_posts shortcode that is available to use only on sites.augsburg.edu pages. The shortcode does what it says, it shows your posts!

Usage

You can use it like this:

[show_posts heading="My Heading" category="my-category" amount="6"]

The shortcode, as you can see, takes three attributes: ‘heading’, ‘category’ and ‘amount.’ The heading attribute can be simple text. The category attribute should match a “Slug” for a category that is already defined under Posts > Categories. If you go the Post > Categories page the Slug has its own column in the Categories table, so you can take the value directly from there. The amount attribute is a number and it will control how many posts are shown, if you leave the amount attribute out all posts of that category will be displayed. For example:

[show_posts heading="My Heading" category="my-category"]

Output

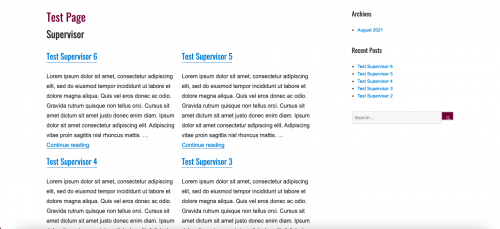
When the shortcode runs on a page, it will output the posts in a grid that will adapt to the width of you page and display as many posts as will fit into each row. It looks something like this:
Reference

Three Attributes

  • heading: simple text – defaults to “Posts”
  • category: category slug – defaults to “uncategorized”
  • amount: number – defaults to show all

Examples

All attributes

[show_posts heading="My Heading" category="my-category" amount="6"]

Show all posts in a category

[show_posts heading="My Heading" category="my-category"]
Widget Visibility

Prerequisite: Your sidebar / widget area is managed in the Customizer. Read my tutorial on the Customizer if you haven’t used it before.

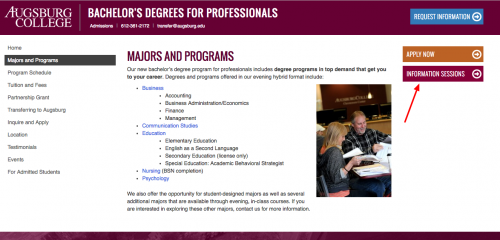
Widgets in your sidebar appear on every page of your website by default. This is great, because it provides increased visibility for your most important calls to action. See the “Information Sessions” button on this page:

information-sessions

Click on the image to view the full-size version

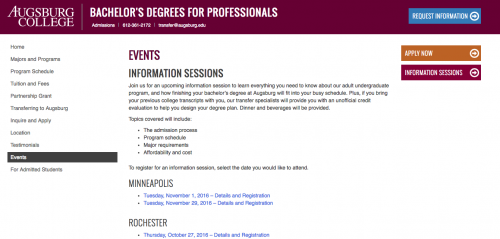
This button links to the Events page on the same website. But when we go to that page, the button is still there even though we don’t need it. We’re already on that page!

information-sessions-2

Click on the image to view the full-size version

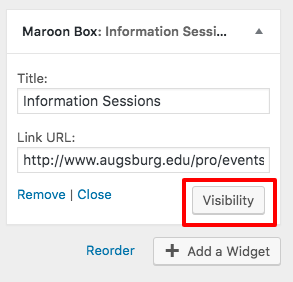
You may encounter situations like this, where you want a widget to appear on all pages except one, or maybe you want it on just one page and not all pages. You can make these customizations using the Visibility option on your widget:

widget-visibility

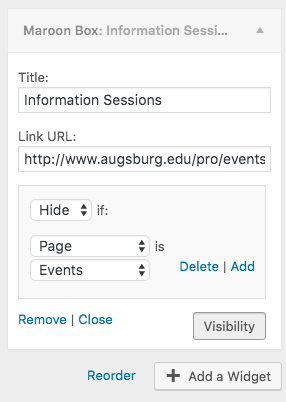
Click on the Visibility button and you will see the options to Show or Hide the widget based on page:

widget-visibility-2

Make sure you select a specific page.

And that’s it! Save your changes and verify the widget is behaving the way you want it to.

If you do not see the Visibility button on your widgets, let me know. I may need to make a change to your website in order for that button to show.

The Customizer

Note: Some Internet Explorer users have experienced problems with the Customizer. Try using Firefox, Chrome, or Safari instead.

I will be going through old tutorials on my website, updating them to reflect the new website template. However, the only significant change in terms of managing websites is the implementation of the Customizer, which I will explain here. In the past, you went to the Widgets area to manage your sidebar widgets, and you went to the Options page to edit the contact information that displays in the upper right corner of the website. Now, you will edit both of these using the Customizer. You can access the Customizer by clicking Customize in the Admin bar:

customize

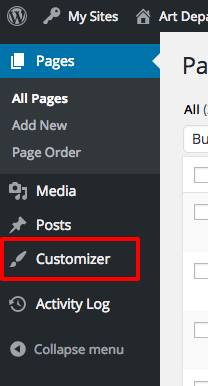
Or Customizer in the Admin menu:

customizer

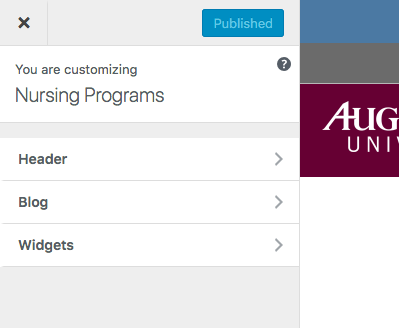
This will open the Customizer. There you will see the options for both the Header and Widgets.

Header, Blog, Widgets

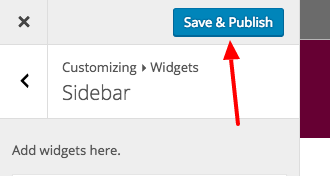
As you make changes, you will see the changes reflected in the preview window to the right. Note that this is only a preview. In order to save your changes you must click the “Save and Publish” button:

customize

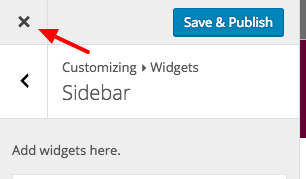
You can leave the customizer by clicking the X in the upper left corner:

customize

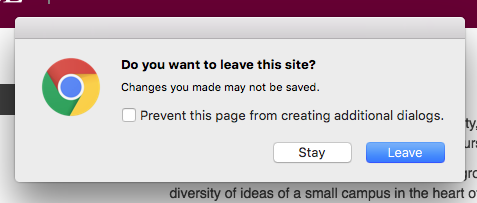
If you try to close the customizer without saving your changes, it will prompt you to confirm that you want to leave without saving your changes:

customize

You can click “Stay” to remain in the customizer and continue editing or save your changes. Click “Leave” to leave the customizer without saving your changes.

Accessibility Guidelines

Making your website accessible is easy with WordPress. Most of the work is already done for you, in the technical design of the website, but some of it is up to you. Here are the main things you need to:

  1. Use Headings instead of bolded text
    • If you write a heading , highlight it, and click the “B” to bold it, then you have created a bold text that simulates a heading but is not technically a heading. Instead, use the options Heading 2 or Heading 3. Continue reading